
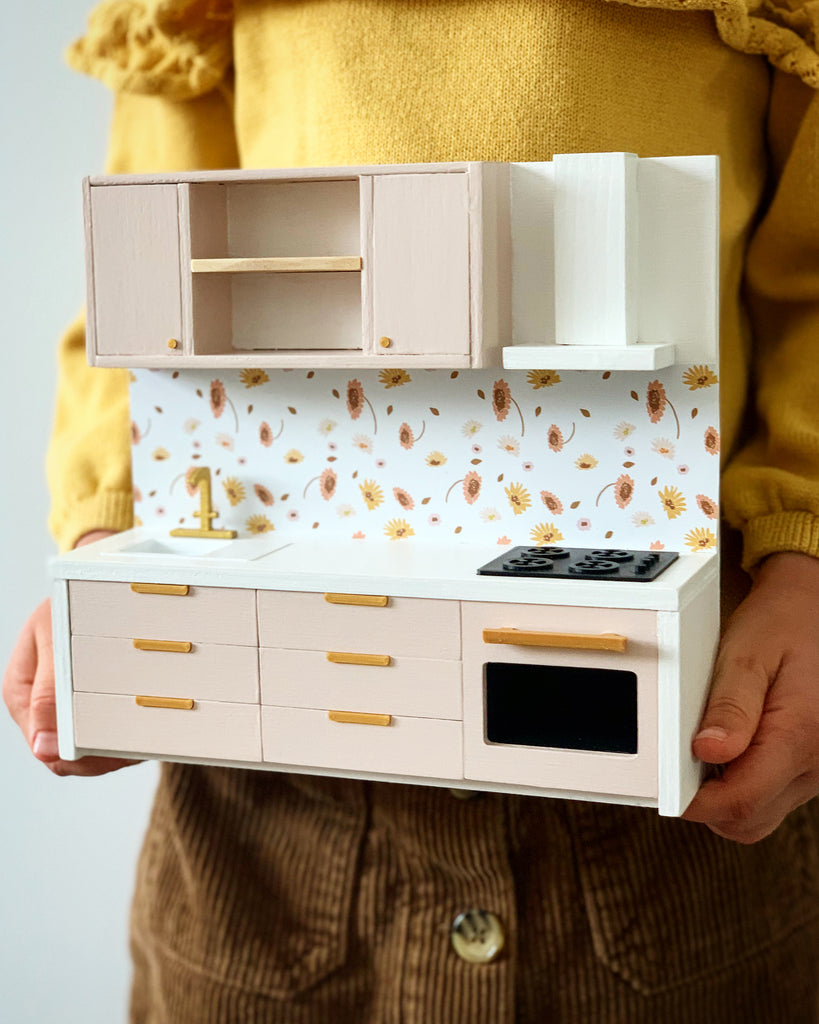
This is the assembly instructions for the Deluxe Whimsy Kitchen as found in the DIY Kit.
For this particular kit I would suggest you assemble first without glue to make sure you understand how it all goes together. Read through the instructions before assembly.
Once you have assembled without glue, I would also take some time to think about the way you would like to paint the kitchen. I find it easier to paint certain pieces before assembly and there are certain pieces I like to leave off until after painting. I usually paint the drawers and oven front before assembly as well.
1) Apply wood glue to the grooves of the upper cabinet part of backing plate.

2) Find the two pieces for the upper cabinet that are shorter (see photo). Apply glue to both ends.


3) Insert the two pieces into the backing plate. Smooth side facing inwards with wider grooves on top.

4) Find the longer cabinet parts and apply glue to the top and bottom gooves. The piece that has the little notch in it goes on the right side.

5) Insert the notched cupboard piece into the groove on the right. The notch is on the bottom. Smooth side facing out.

6) Use the longer 4mm pieces and insert them into the grooves on the backing plate and end piece.

6) Apply the other cupboard end piece. Wider groove on top.

7) Apply glue to the inside of the cupboard grooves, where the doors will fit. Place the cupboard doors inside.
Wipe away excess glue. For the wooden shelf, don't glue it in just yet but place it into the grove. Push all of the pieces together ensuring they are all snug, aligned and look right. Once this is done you can remove the wooden shelf or glue it into place if you want to paint it.

8) Glue in the rangehood pieces.


9) Apply glue to the remaining backing plate grooves. Insert the 4mm piece (that has no inlays)

10) Apply glue to the side pieces grooves and the groove of the 4mm piece that has the oven hole in it.

11) Apply the one side piece.

12) Apply the 4mm piece with the oven hole in it followed by the other side piece.

Everything should slot together. Ensure all pieces are pushed into the groves and are snug and aligned.

13) Apply glue to the tops of the pieces

14) Put on the counter top. Ensure everything is flush and aligned.
At this point I would wipe away excess glue and allow the glue to dry. Lightly sand and paint your kitchen. I would paint the drawers and oven front separately.
I recommend using a water based acrylic paint. I always use semi gloss so they are easy to clean and the finish is harder wearing.
After the first coat, sand away any roughness and apply remaining coats.

14) Once everything is painted, you can start applying hardware and do the final assembly. Insert the oven using a dab of super glue.

15) Glue on the oven front and drawers.

16) With a little super glue, apply the oven handle, drawer handles, sink, stove, tap and cupboard knobs.
With wood glue- insert the wooden shelf


If you are applying our self adhesive kitchen backsplashes, please ensure the area you are applying it to is painted (water based paint) smooth and clean. Peel the backing from the backsplash, align it with the edges and stick it on. smooth it out.
